Saturday 31 March 2018

L'automobile de précision - press / show car

Currently Jos is travelling abroad for the coming two weeks for business reasons, meaning not a lot will be done on the car. So you will have to do with my admin updates and findings about this car. I like the challenge as there is very little known or available about this car. The first thing I have purchased is this fiche. I did happen to have bought a similar fiche about a different Monteverdi car years ago - not sure why though.

As can be seen, the fiche is not very special, a photo on the front and the usual details and speficiations on the backside. 

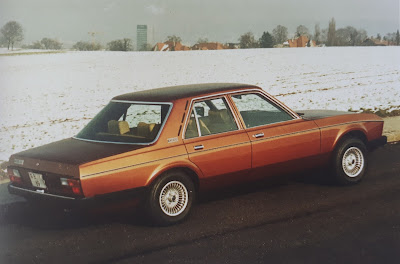
The photo used is a very interesting one though. It's likely the first press/show car of the Sierra. It's not having the "Wolf Race" wheels that got standard fitted. I'm unsure which brand and model these rims are though. Anyone?

Furthermore this is the only model that has "air vents" in the C-pillar (or are they some kind of decorative ornaments?) All other models are having this decorative strip placed with chrome pipings.

And all other models I have seen so far are having as well the horizontal chrome pipings from the bottom and top rear window towards the side windows, which is missing on this press/show car too. See the photo below the fiche as verification example.

Based on the color, these little details described above and the VIN I now suspect our car is potentially this one. Furthermore I can see the location of the Monteverdi badge on the C-pillar is on the same location as ours, meaning it does not allow room for the chrome horizontal piping either.

By now I also just noticed our badges does have a black horizontal line included below and above the inscripted name. And our badges are as such slightly larger. Again a small detail which is different from the other ones I have seen online.


Click the photo to enlarge for more detail.


Difference in badge size. Due to the smaller size used it does allow room for the chrome trim piping.


I do happen to have found another photo of the press/show car from a different angle. With a magnifier I was able to see these are having the larger badges used (c-pillar & boot) - although it was impossible to see the black lines on the badge.


Let's see if I can uncover more details about our car. As always I welcome any input or remarks. This blog does not require a Google account to comment.

Wednesday 28 March 2018

Bespoke rear lights

It's quite fascinating to see how this bespoke boutique car was made. Only look how the rearlights were mounted (ignore the cabling, this was already highlighted in a previous blog).


We have already secured a NOS rear light set. And as known, these are coming from a Renault 12.
Before mounting them we have a lot more to do ... At least we have the pictures to enjoy them now.


Monday 26 March 2018

Weekend - The tear down - part III - Swiss Spaghetti

On Sunday Jos did do a little more work. The front chairs were quite stuck so they have been soaked with WD40. Thus moving on to the wiring removal. It's amazing to see how flimsy these have been put together. Not something you would expect from a high-end luxury car. Some cabling had no insulation/shielding anymore so there was potential danger of shortcutting. So another job on the todo list: build a complete new wiring harness. Unless we can obtain a complete Original (Mopar) wiring harness. Maybe this can be still newly obtained in the USA? Anyone? I offer an applepie for a positive lead!

You can click on the photo's to enlarge them:


Connector block to the rear lights. Yes, you see it correctly, they used some sliding shoes into the connector and other cheap connectors.


And some cabling without insulation / shielding (not a one off situation). Doesn't look like this is caused by rodents but caused by poor cabling causing friction and removal of the shielding.


 And now all nicely labelled


And some Original Chrysler labelling:


Sunday 25 March 2018

Weekend - The tear down - Part II

Let's carry on with a small report on part II. Time to remove the remaining of the interior trim. The ceiling did had it's best time:


Various cover and door panels were removed


And once all dismantled the puzzle looked like this


So what came out of it underneath. All doors were surprisingly good.


Some other bits were in a lesser condition


 This is an area that has become a victim of moist and rust


And a slight touch of surface rust on the ceiling


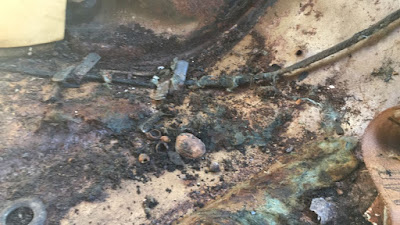
The drivers area had a floor panel that was completely rotten and wasted.


 All other floor areas were okay-ish and the important chassis parts were rock solid


So till now it does not look to bad (keep that positive vibe!) but it will require a fair piece of work to be done. Curious to see what Jos is going to do next. Watch this space.